In this tutorial, we’re going through all the steps needed to connect user input from Contact Form 7 to Google Sheets. The idea is to let your users submit a form on your WordPress page and have the data added to a Google spreadsheet.
Requirements
Before we begin. Let’s look at the requirements for this to work, you need the following plugins installed on your self hosted WordPress site:
- Contact Form 7 (free) – We’re using this plugin to design and display the end user facing form.
- WunderAutomation (free) – we use WunderAutomation to set up the workflow.
- WunderAutomation add-on for Contact Form 7 (currently free) – Needed for WunderAutomation to detect when a Contact Form 7 form is submitted
- WunderAutomation add-on for Google Sheets (premium) – Needed to take the user input from the form and send it to a Google spread sheet
This tutorial also assumes you have some basic knowledge about using WordPress and Contact Form 7.
Preparing Google Sheets
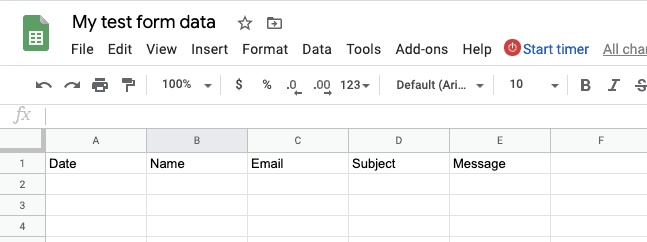
For this tutorial, we’re going to collect form data into a Google Sheet. The first thing we need to do is to prepare a Google Sheet that will receive the data. We’re naming this “My test form data” as indicated in the image below. We also set column names for the five columns where we want the data to end up. By naming these columns in Google Sheets, we’re going to have an easer time filling out the WunderAutomation action later.
Connecting WordPress and Google Sheets
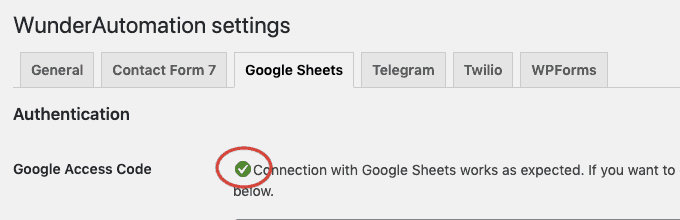
Once the Google Sheets add-on for WunderAutomation is installed, we need to authenticate it to be able to access the Google account. Perhaps easiest explained in step 1 of this video:
Look for the green checkmark to verify a successful connection between your WordPress installation and your Google account:
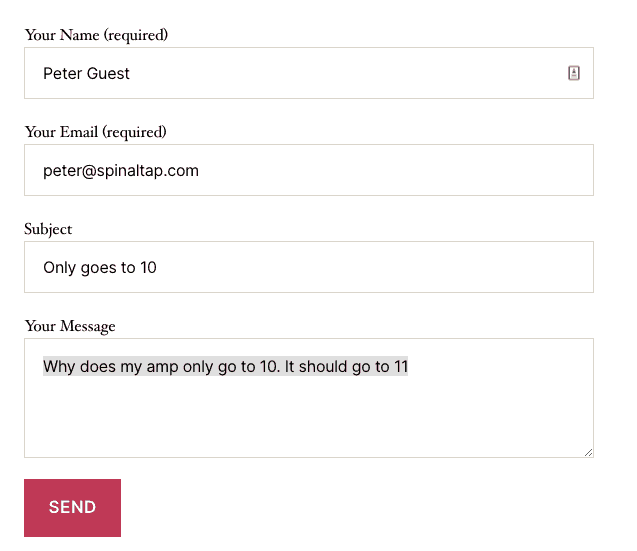
Creating a simple form
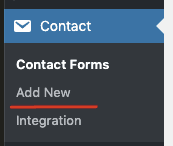
Let’s start with creating the most simple form possible using Contact Form 7. We’re just going to select Contact >> Add New from the dashboard menu:’
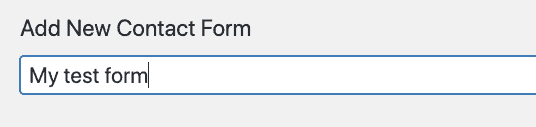
…and give the new form a name:
And then hit save which should lead you to something like this:
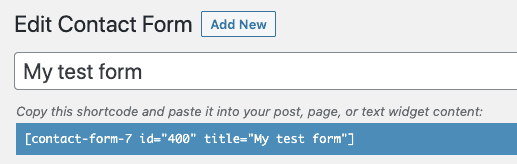
Note that the resulting form id = 400, we’ll need to remember this number.
What we just did was to save a form with the default Contact Form 7 fields which are:
| Field ID | Caption |
| your-name | Your name |
| your-email | Your email |
| your-subject | Subject |
| Your messagw | Your message |
If we were to put the short code (shown above) into a footer widget, we’d see this on the front end:
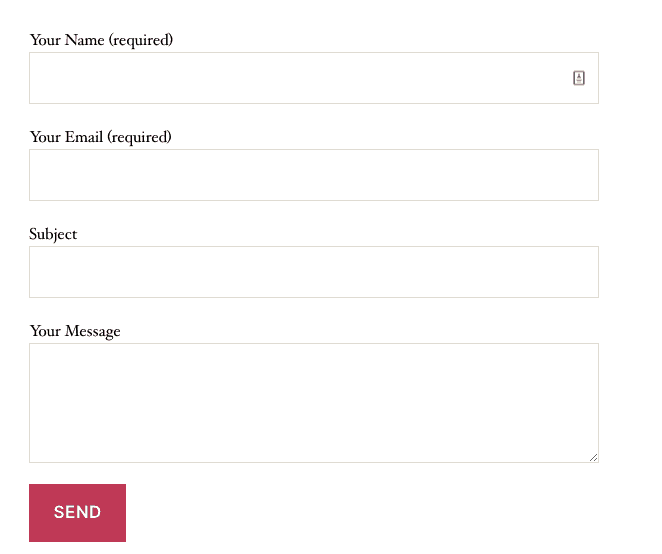
That’s about as much energy we’r going to spend on the actual form creation for this tutorial. For now, all we need to know is that we have a form with the internal ID of 400 and that the form has 4 individual fields.
Creating the workflow
Next step is to create a WunderAutomation workflow that handles when this form is submitted by an end user. We’re going to create a workflow, add a Trigger, two filters and one Action using some parameters. To do this, we navigate to the Automation menu, select the Workflows option and click on Add Workflow.
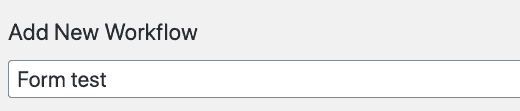
Once the Workflow editor is visible we need to set a nam, we’ll call this “Form test”:
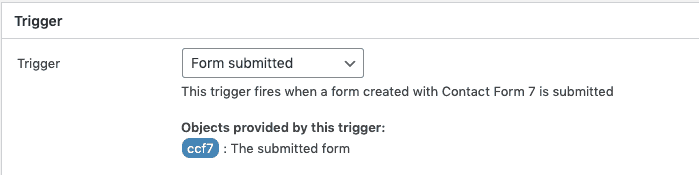
Setting the trigger
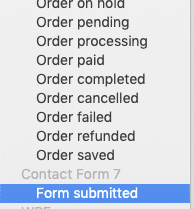
After installing the Contact Form 7 add-on, you now have the option to use ‘Form Submitted’ as a workflow trigger. This is the trigger we’ll use:
Setting up filters
We’re going to set up two filters:
- One filter to ensure that we’re dealing with submissions from the expected form
- Another filter to remove submissions from the example.com domain
In the Filters section of the workflow editor, click ‘Add filter group’:

Select ‘Form identifier’ as the first filter and select operator ‘Equals’ and enter the number 400:
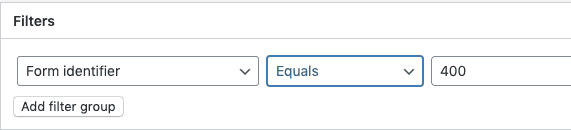
As you might remember from above, the form we created with Contact Form 7 was assigned the id 400. When this workflow triggers, we want to make sure that we’re only working with submissions to this specific form, so that’s why we add this as a filter.
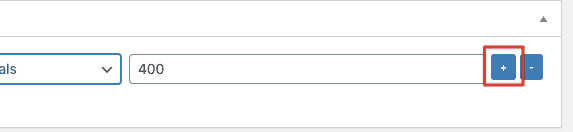
The next filter we’re adding is to make sure that the email address of the submissions is NOT from the example.com email domain. We’re adding this mostly to show you that it’s possible to filter using the submitted field data. But it could be convenient to filter out submissions from your own domain. To add this filter, hit the plus sign at the right hand side:
…and add the following rule:
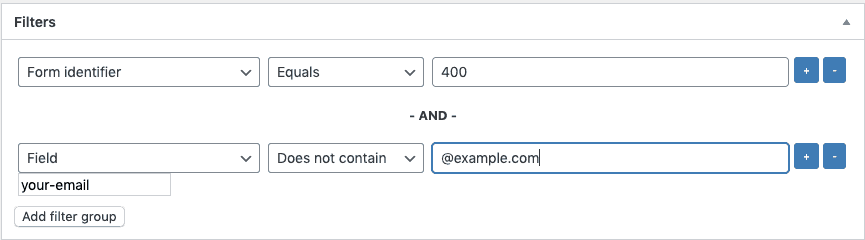
As you can see, when defining a filter that deals with an individual field name, we have to type that field name into the new text box that appears under the filter name. Then we add the operator “Does not contain” and the comparison value “@example.com”.
Taken together, we now have two filters that say:
If the submitted forms has id id = 400 AND the field ‘your-email’ doesn’t contain “@example.com” – go on processing this workflow
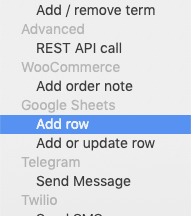
Creating the action
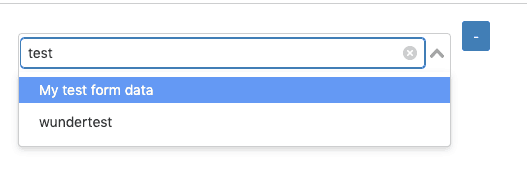
Last part of the workflow is to set up the action. Scroll down to the actions part of the workflow editor. Click ‘Add action’ and select the Google Sheets – Add row action:
Next, click ‘Refresh sheet list’:
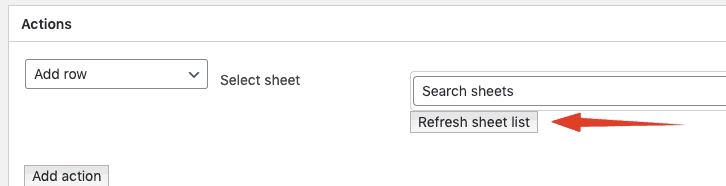
and select the name as defined in the first step above: “My test form data”
by selecting the correct document, the list of tabs will become visible. As will a few more options:
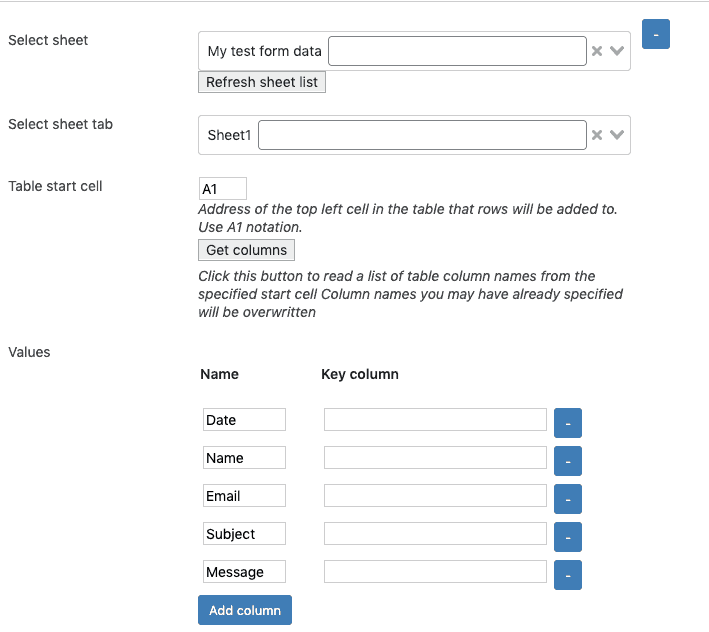
After selecting the correct tab/sheet, you have to tell WunderAutomation what part of the document that is the start cell. After doing that, you can refresh the columns by clicking ‘Get columns’
Now, for each column in that was read from Google, we now want to define what data to put it. We’re going to use the parameter editor. Click the ‘ccft7.field’ pill in the right hand side parameter menu to see the popup parameter editor:
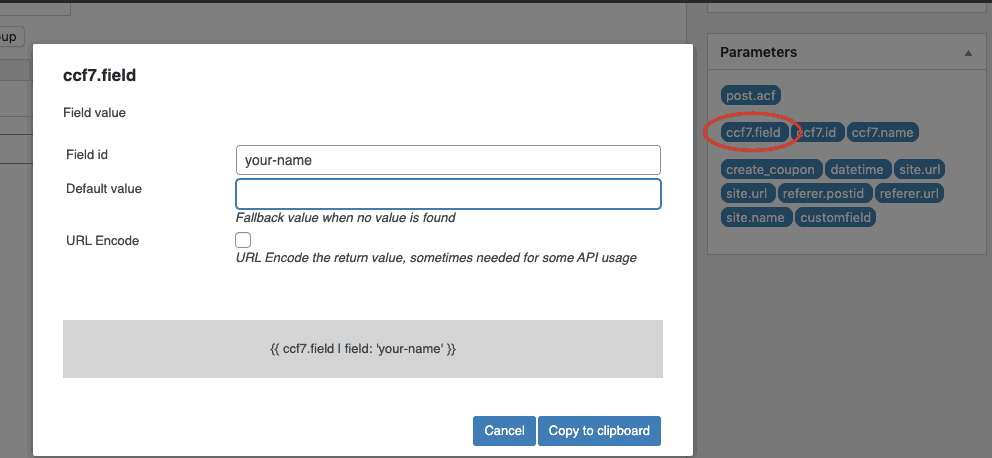
The popup parameter editor makes it a little easier to create the parameter placeholder codes. Read more about actions and parameters here. Fill in the form field name and click ‘Copy to clipboard’, then paste the result into the appropriate field.
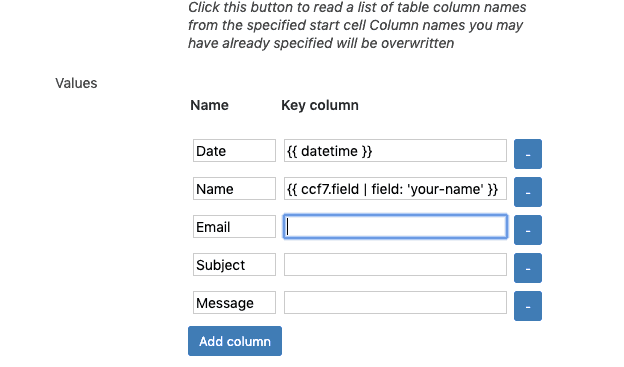
Continue filling out the column names. When ready, it should look like this:
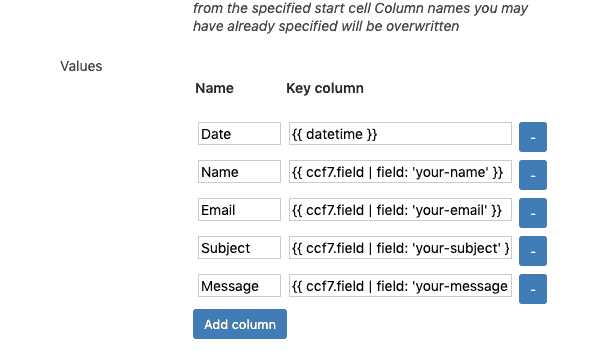
As you can see, we’ve also added the parameter placeholder {{ date }} into the date column. This is a built in standard parameter that always return the date / time when the workflow is executed.
…and that’s it. Scroll back up to the top of the page and click Save on the right hand side to save your new workflow.
Testing the workflow
With the above steps we’ve actually done everything needed to collect your users submitted data in to a Google Sheets document. Let’s give it a go:
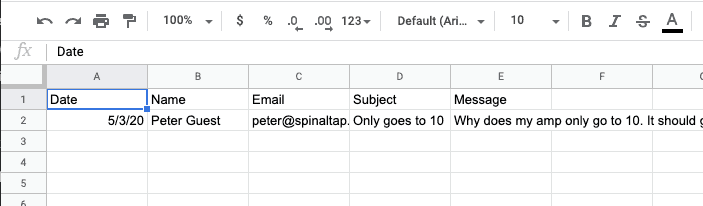
Heading over to the Google Sheets document, we now find this row: