
In this tutorial we going through the steps to use MailPoet and WunderAutomation to send out unique personalized WooCommerce coupons using a MailPoet email template.
There are may situations where you may want to send out a coupon to someone. In this tutorial we’re going to focus on on a case where you send out coupons after a user has subscribed to your MailPoet newsletter. But since we’re building this functionality using WunderAutomation, you could easily trigger this outgoing email in a lot other situations as well:
- When a new user signs up on your website
- When a WooCommerce order over a certain amount is marked as complete
- When a user has submitted a product review
We’re going to use the following plugins in this tutorial
- WooCommerce – Well, this is should be obvious
- WunderAutomation (free) – Our Swiss army knife automation plugin for WordPress.
- The WordPress MailPoet plugin
- The MailPoet for WunderAutomation add-on – our USD $59 premium add-on for adding MailPoet triggers and actions to WunderAutomation.
Step 1 – Installing the needed plugins
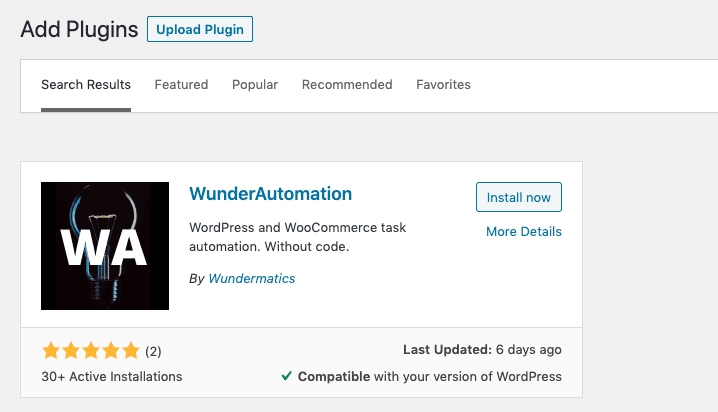
WunderAutomation installs like any other plugin from the WordPress repository. The easiest way is to go to the plugins section on our WordPress dashboard and click Add new. In the search box, type in “wunderautmation” and follow the usual steps.
MailPoet for WunderAutomation is premium plugin that first needs to be purchased from our store. Once you have received the email with license code and download instructions. Just go ahead and install the plugin using the “Upload plugin” button:
Click install now and then follow the instructions to activate the plugin.

Click “Save Changes” and you’re done.
Step 2 – peparing a MailPoet email template
We could make it easy for ourselves and just send out a plain text email with the coupon code, but since the goal for this tutorial is to show how you can use the MailPoet plugin together with WunderAutomation, we’re going to send the coupon using a MailPoet template. The benefit of this approach is that you can use all the features in the MailPoet designer to make use of your branding including logos, colors and layouts etc.
We start by going to MailPoet >> Emails. You may already have an email template that you want to duplicate but in this tutorial we’re just going to create a new email by clicking Add new and follow the wizard to create a new plain text email. Once we’re in the MailPoet visual editor we can start editing the content in the editor. The important part is this:

We’re using a MailPoet shortcode as a placeholder for the generated WooCommerce coupon. To distinguish it from any other MailPoet shortcodes, we’re using the category “wunderauto” and an action called “coupon.” We’ll use this action later in step 4 below.
Step 3 – creating a template WooCommerce coupon
When creating coupons via WunderAutomation we’re actually creating copies of an already existing WooCommerce coupon. This means that we can use the standard WooCommerce coupon editor to fine tune coupon behaviour. When the workflow runs it will create a unique copy of the coupon including any restrictions you have added.
We start by going to the WooCommerce coupon section and create a new coupon via Marketing >> Coupons >> Add coupon:

At this point all we need to set up is a name for the coupon and the basic settings for it, here we are creating a general 15% checkout discount:

You can add any additional restrictions to this coupon for example to make only apply to a certain product category etc.
Activate the coupon by clicking the Publish / Update button in the upper right hand corner.
Step 4 – Set up a workflow
Next we’re going to put all the pieces together and set up a new workflow. Simply put, a workflow is a combination of a trigger, one or more filters and some actions, often enhanced using parameters.
To create a new workflow, we’ll just go to the Automation menu, select Workflows and click Add Workflow to open up the workflow editor screen.

Go to the Automation >> Workflows in your WordPress admin dashboard and click Add Workflow to get started. First we need to give the Workflow a name, for example this:

Workflow trigger
Our workflow is going to run every time a new subscriber signs up for our MailPost newsletter. To do this, we’re going to use the MailPoet specific trigger “Subscriber status changed”.

Whenever a MailPoet subscriber status changes in any way, this workflow will be triggered. We’re only interested in sending this email to confirmed subscribers, so we’re going to restrict this trigger a bit using a filter.
Workflow filters
Since most serious web pages use double opt-on, a MailPoet user normally goes through several states.
First, the user signs up for your newsletter via a form on your site. At this point the users email address is stored in your database with the status “Unconfirmed”. WunderAuotmation will detect that there is a new user added and fire the “Subscriber status change” trigger the first time.
The user will then receive a confirmation email with a request to verify that the signup was not unintentional. When the user clicks the confirmation link, the internal status of that user will go from “Unconfirmed” to “Subscribed”. When this happens, WunderAutomation will again detect the change and fire the “Subscriber status change” trigger a second time.
We’re only interested in sending out coupons to users that confirm their subscription, so we’re going to add a filter that check for that the current subscriber status has gone from “Unconfirmed” to “Subscriber”. Here are the two filters we will add:

We’re combining two filters here. First we require that the old status for this user was “Unconfirmed” and then that the current status is “Subscribed”. This ensures that the workflow stops unless in the case where a user goes from Unconfirmed to Subscribed status, which is just another way of saying “new subscriber”.
Note that if you don’t use Double op-in (though we recommend it strongly) you may need to tweak these filters, so that the previous status can also be “Null (non existsing)”, like this:

Workflow Actions
So far we’ve configured a workflow that will trigger when a user status is changed and added filters so that the workflow only runs if when a new subscriber is added, we’re now ready to add an action.
The action describes the thing we want WunderAutomation to do. In this case we’re going to send out a MailPoet email using the template from step 2 and that email will contain the WooCommerce coupon we created in step 3. First, we’ll add create the action by clicking the “Add action” button in the actions area.
We want to use the “Send MailPoet Mail” action and we’re going to use the template named “Thanks for subscribing” that we created in step 2.
Action and template

Personalizing the action using parameters
Next we need to specify who the email is being sent to and we can also optionally override the email subject that we already defined in the MailPoet template. To do this we’re going to use WunderAutomation parameters:

The text inside the double curly brackets is a WunderAutomation parameter. As you may have guessed, the to-field is going to be filled with the email address of the MailPoet subscriber and the subject-field is going to get the first name of the subscriber added into it.
Don’t worry, you don’t have to remember exact parameter name or the syntax since WunderAutomation can insert them for you. For example. put the input cursor in the “Subject” field and click the mp-subscriber.first_name pill found in the right hand side parameter box:
Selecting a paramter:

Then when the parameter editor opens up, just click the insert button to copy the parameter specifics to the correct field:
Inserting the parameter:

This will add the correct parameter syntax into the correct field.
Adding the coupon
Now it’s time for the most important part of this tutorial. In step 2 above we created a MailPoet template to use. In that template we made a placeholder for the actual WooCommerce coupon. In this last step, we’ll show you how to generate copies of the coupon and make sure it’s inserted into the outgoing email.
Create an additional shortcode
We’re actually not going to add any email body text in this tutorial, instead we scroll straight down to adding an additional shortcode. Click on the Add key/value pair button to create an empty row:

Any key we add in this section will be accessible in the MailPoet template using the syntax wunderauto:[key]. In step 2 we used a shortcode called wunderauto:coupon, so what we want to do here is add a key named coupon:

The value for this field is going to come from a special WunderAutomation parameter called create_coupon, you will find it in the parameter box on the right hand side. Put the text cursor in the value field and then click that parameter, the following editor will pop up:

Here you define which existing coupon to use as a template. You can also define a specific expiry time (in days), a custom prefix to use and a few other properties. Perhaps the most important property you want to override is the Allowed emails property. Filling this with the value of the MailPoet subscriber email will tie the coupon to the specific subscriber email address, making it impossible to use the coupon for anyone else.
As you can see in the lower part of the parameter editor, the fields you fill in will build up the parameter attributes in a ready-to-be-used shortcode. Click the “Insert” button to thet the parameter copied to the value field:

And that’s the last step in the workflow editor. Save and exit the editor and get a fresh cup of coffee and pat yourself on the back because you have just created a pretty cool WordPress automation task.
Conclusion
With this automation in place any new subscriber to your MailPoet newsletter will automatically get a personalized WooCommerce coupon.
Since we are reusing the MailPoet visual editor you can design the outgoing email pretty much exactly as you want it. And since we’re reusing the WooCommerce coupon functionality you can adjust the coupons to fit your exact business needs. We’ve just been using WunderAutomation to glue them together.
Do you think you can generate more than USD $59 in yearly sales using this automation? We think that most businesses can but if you are unsure please remember that we offer a 30 day money back guarantee on the MailPoet ad-on. If you’re not happy after 30 days, just let us know.
If you have any question about this example automation workflows, the MailPoet add-on or WunderAutomation itself, please don’t hesitate to reach out via the comments section below or via our support / contacts page.