
MallChimp has lots of powerful functionality to help you succeed with your email marketing efforts. One of these functionalities is the ability to place meaningful tags your contacts.
For instance, if you want to identify your most frequent users, you may want to set the tag “Big spender” to these customers in MailChimp. Once this tag is in place you can create MailChimp campaigns based on that tag to let your “Big spender” customers know first about certain news.
But manually setting tags on the users will quickly become tedious and error prone. This is the type of task you’d want to automate. In this tutorial we’re showing how to use WunderAutomation together with the MailChimp addon to solve this exact problem using the following parts:
- A MailChimp account – Should also be fairly obvious. Everything we’re going to show in this tutorial works well with a free account. But you can create way more powerful automations with a premium account.
- WunderAutomation (free) – Our Swiss army knife automation plugin for WordPress.
- MailChimp for WunderAutomation (premium, $59 yearly) – Our add-on that adds MailChimp specific functionality to WunderAutomation.
- WooCommerce
The workflow we’ll be creating will trigger each time a WooCommerce order is marked as completed. Once it is, we’ll look at the order history of the customer and determine if he’s over our “Big spender” limit or not. If he is, we’ll tag the user in MailChimp accordingly.
Step 1 – Installing the needed plugins
WunderAutomation installs like any other plugin from the WordPress repository. The easiest way is to go to the plugins section on our WordPress dashboard and click Add new. In the search box, type in “wunderautmation” and follow the usual steps.

MailChimp for WunderAutomation is premium plugin that first needs to be purchased from our store. Once you have received the email with license code and download instructions. Just go ahead and install the plugin using the “Upload plugin” button:

Click install now and then follow the instructions to activate the plugin.
As a last install step, you also need to provide a MailChimp API key. MailChimp does a good job of explaining how to get an API key here. https://mailchimp.com/help/about-api-keys/
Next, in your WordPress admin dashboard, go to Automations -> Settings. Select the MailChimp tab and paste in your API key;

Click “Save Changes” and you’re done.
Step 2 – Set up a workflow
First, lets’s create a new WunderAutomation workflow;
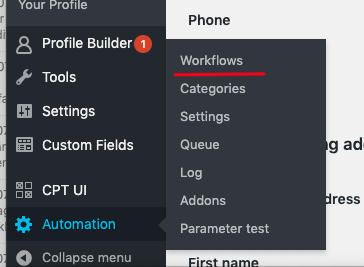
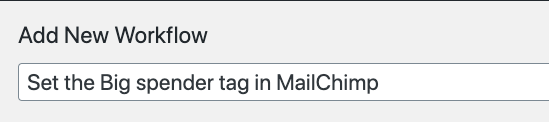
Go to the Automation >> Workflows in your WordPress admin dashboard and click Add Workflow to get started. We also need to give the Workflow a name, for example this:
Trigger
Our automation workflow will run every time an order is marked as “Complete”. To do this, we select the “Order completed” trigger, this will run every time an order is marked as completed.
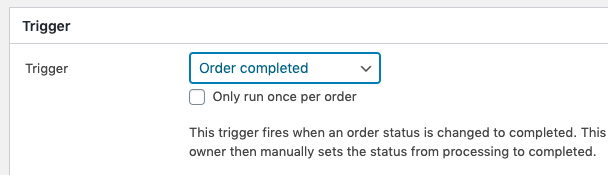
If we want to, we can make sure that this workflow is only executed once for each specific order. But in our case it’s not really necessary so we’ll leave it unchecked.
Filters
The conditions for getting the “Big spender” tag is that the total order amount of this and all previous orders is above a certain limit. WunderAutomation has a build in filter for this to it’s easy to accomplish.
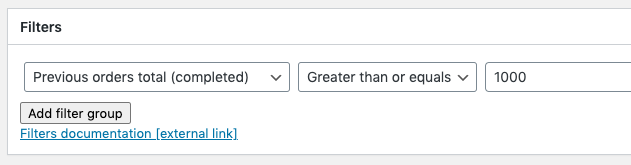
The filter “Previous orders total (completed)” will calculate the total order sum of all previous orders for this specific customer (identified via the email address). We use the operator “Greater than or equals” and the value 1000 (in whatever currency the store is set to use).
Note that this filter does not take ongoing orders into account. It would also be possible to filter on the total count of orders if we’d be interested in tagging returning customers.
The combination of the trigger and the filter will ensure that we only run this automation when an order is completed and that the order customer have spent at least $1000 in our store. If these conditions are met, the workflow actions will go ahead and execute.
Actions
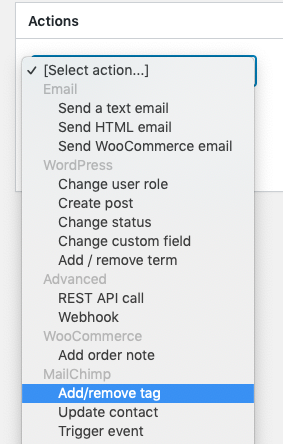
The last part of this tutorial is to send a command to MailChimp to tag this user. We do this with an action named “Add/remove tag” in the MailChimp section of the actions dropdown:
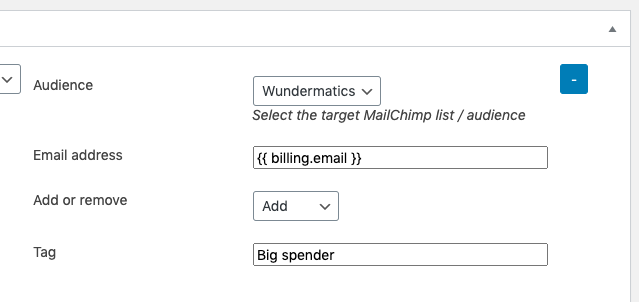
The fields we need to fill in are these:
| Field | Description |
| Audience | This is a dropdown box where you select the MailChimp list / audience you want to work with. Available list names are fetched from your MailChimp account. If you don’t see any names in this box, you probably didn’t enter the API key correctly (step 1). |
| Email address | This is the email address we want to update in MailChimp. We could choose between either the {{ user.email }} to send the email address of the WordPress user. But since a WooCommerce order can be placed by a guest, it’s often safest to user {{ billing.email }} instead. |
| Add or remove | We can use this action both for adding and removing tags. In this case we want to add it, so we select Add from the dropdown |
| Tag | This is the name of the tag we want to set. |
Summary
With this automation in place, all our big spenders will get tagged automatically in MailChimp. This enables us to use various segmentation and automation functions in MailChimp to reach the correct audience with our email marketing.
As you’ve probably already guessed, this is just a small taste of what kind of email marketing automation you can get going using the MailChimp for WunderAutomation plugin. For instance, we’ve recently posted about automatically sending WooCommerce coupons to new MailChimp subscribers.
Please note that we offer a 30 days money back guarantee on all our premium plugins. If you purchase MailChimp for WunderAutomation and find that it doesn’t work as you hoped, just ask us for a refund.
Questions, ideas, criticism? Let us know what you think in the comments below.