
In this tutorial we’re showing you how to use WunderAutomation to trigger zaps in Zapier via webhooks. We will show how to send custom data to the Zapier webhook and trigger a message to be sent to a Slack channel.
NOTE: Since this post was published, WunderAutomation got support for a dedicated Webhook action that makes this even easier. Stand by for an updated post soon.
Requirements
To follow this tutorial you will need
- A Zapier account
- At least one app set up in Zapier that can receive some data. We’re using Slack for this tutorial for demonstration purposes, but you can set up any other app you want to including email, Google Sheets, Mailchimp, Facebook etc.
- WunderAutomation (free)
- At least some basic knowledge about the JSON format
Setting up a webhook
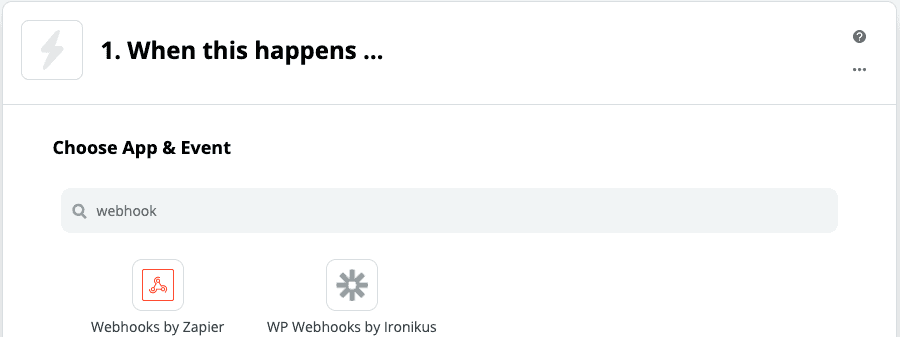
Our first step is to set up a webhook in Zapier. Create a new zap, Zapier will ask you to define a trigger. Start typing webhook and select the built in “Webhooks by Zapier”
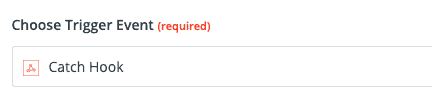
and select “Catch Hook”:
Once you click continue, you will be presented with a unique URL for your webhook, copy and save this URL somewhere safe:

That’s all the information you need to type in right now. We’re going to come back to Zapier later to configure the action part, but to make that easier we’re going to set up our workflow in WunderAutomation first.
Setting up a Zapier action in WunderAutmation
Our next step is to set up a workflow in WunderAutomation that sends data to Zapier. We’re going to use the action “REST API call” to do this. The important part here is to show how to integrate with Zapier, the workflow we create here will be simple.
Go to your WordPress dashboard and create a new WunderAutomation workflow.
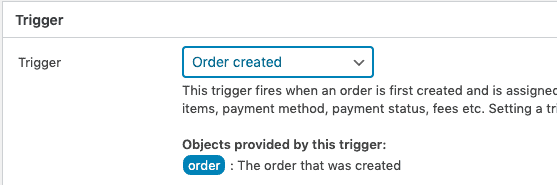
Trigger
We’ll trigger this workflow when a new WooCommerce order is created:
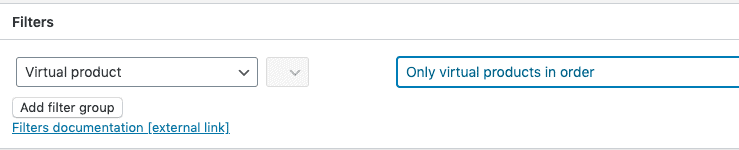
Filters
To raise the bar a little bit, we’re going to use one filter in this workflow. We’re only going to run it if the order consists only of virtual products. We do this to show the power of WunderAutomation to trigger a Zapier zap. With most other tools that can send a webhook to Zapier, this level of control simply isn’t possible.
Action
NOTE: Since this post was published, WunderAutomation got support for a dedicated Webhook action that makes this even easier. Stand by for an updated post soon.
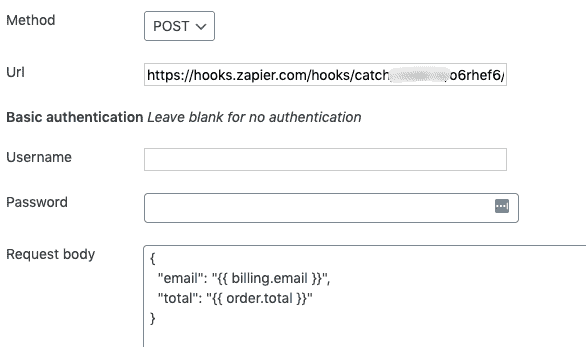
Here’s the meat of this tutorial. WunderAutomation doesn’t come with built in support for Zapier (yet), but we can still do what we need using a “REST API Call” action:
| Field | Value | Description |
| Method | POST | We’re sending a http POST request |
| Url | The unique URL for your Zapier webhook as mentioned in the previous section of this tutorial | |
| Body | A JSON string containing the data we want to send to the Zap |
If you’re familiar with the JSON format, the data we in the request body textarea should be easy to grasp, if not we recommend that you read up on the basics and use a syntax checking tool like jsonlint.com to make sure you’re getting the syntax correct.
For this simple tutorial, we’re sending two fields:
{
   "email": "{{ billing.email }}",
   "total": "{{ order.total }}"
 }
| Field | Value | Description |
| {{ billing.email }} | We’re picking up the email address from the newly created order and putting it in a field simply named “email” | |
| total | {{ order.total }} | This is the order total amount from the order. We’re putting it in a field amply named “total” |
Note: We admit that this is slightly more demanding than using a ready made form specifically designed for Zapier webhooks. We are working on that but at the time of writing this tutorial we can’t share a release date for this feature.
Test the WunderAutomation workflow
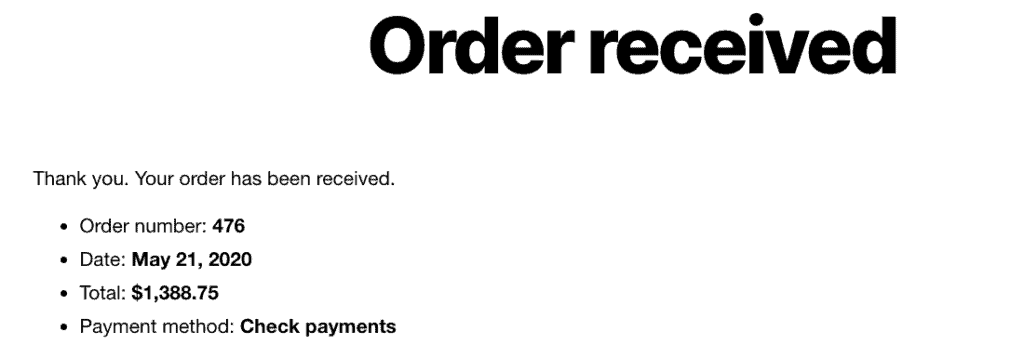
As our next step, we’ll test the WunderAutomation workflow by creating an order. By doing this WunderAutomation will send a request to Zapier. By allowing Zapier to see what kind of data we’re sending we’re making it easier to define the rest of the Zap.
We’re going to assume you know how to place an order in WooCommerce but remember it’s important to get it done.
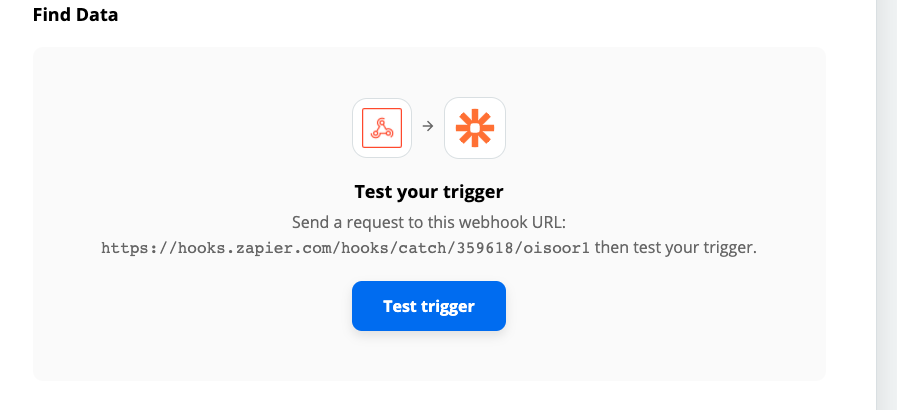
Once an order has been received, we can go back over to the Zapier editor again. Either refresh the page or click the blue Test trigger button:
Zapier should let us know that it already has found a request made to our webhook:
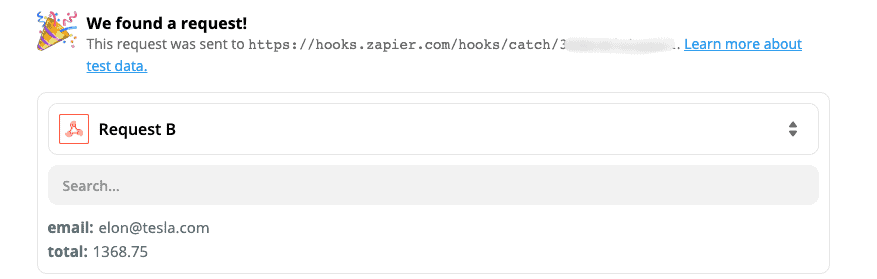
Seing this message means that our WunderAutomation workflow has made a REST request to the correct URL and provided the data as indicated. This means that we can get on with the rest of the Zap.
Finishing the zap configuration
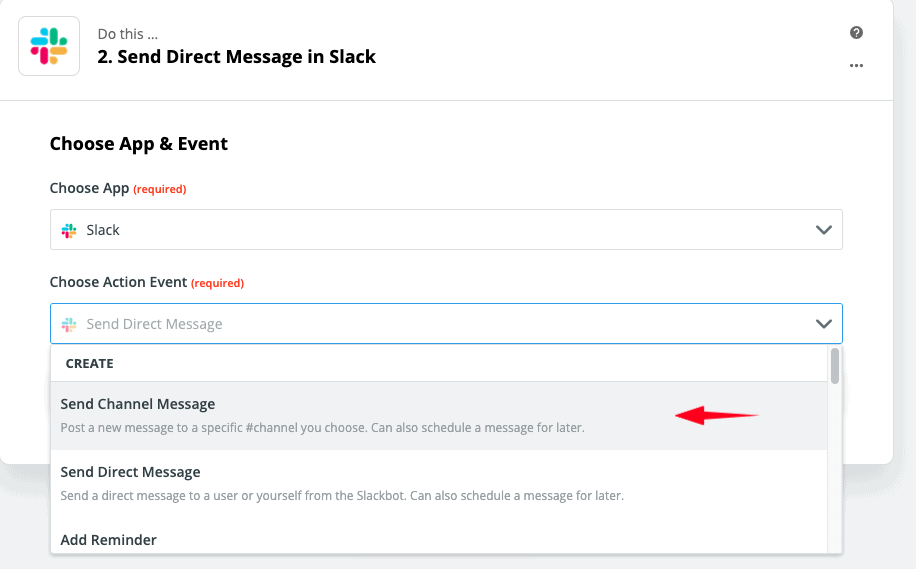
Since we’re sending a message to Slack, we’ll select the Slack app and select to send a Direct message:
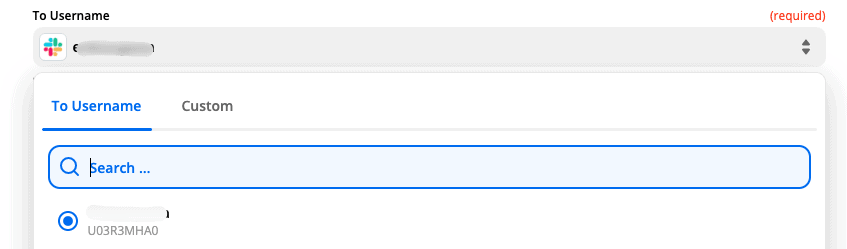
Zapier is going to ask for a Slack account. We’ve already set ours up:

…and the recipient:
Composing the message
Here’s the interesting part. Since Zapier already knows which data fields we’re sending we can now use them when composing the message:
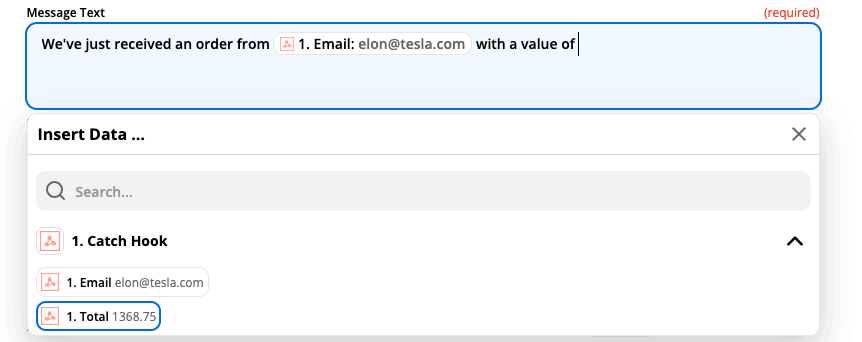
The rest of the fields in this zap can be left at their default values.
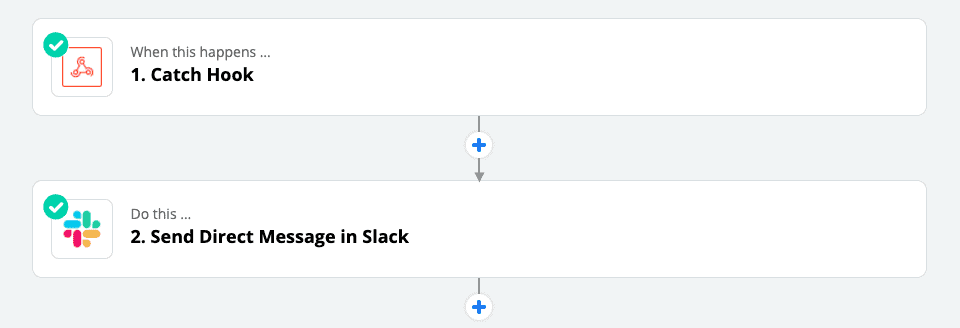
As a last step, remember to activate the zap before existing the Zap editor.
Conclusion
For every new order counting only virtual products we will now get a Slack notification:

The cool thing about this tutorial isn’s so much that we’ve shown you yet another way to send Slack messages from WordPress. The really cool thing is that we’ve done it via Zapier. You are now free to combine the level of control you get in WunderAutomation with all the existing integrations of Zapier.
We think it’s pretty cool. Let us know what you think.