In this post we’ll do a complete step by step walk through on how to use WunderAutomation to send out delivery tracking from WooCommerce. This is a description of a live setup that one of our customers use, everything in this post is in production today.
Background

Our client sells heavy equipment to contractors, forestries and farmers. A typical product they sell would be a screening bucket, grapple or a bucket. Heavy stuff.
They use WooCommerce for all e-commerce and even orders that aren’t generated online are entered into WooCommerce to track fulfilment from one place.
Many orders requires customisations before shipping. These are normally done by the original manufacturer who then ships the finished product directly to the customer. In many ways, this could be described as advanced drop shipping. When a product is shipped, the manufacturer notifies our client with (among other things) shipment tracking information. Our client requires to know the shipping company, a tracking number and if available, a tracking link. The tracking information is then forwarded to the customer.
Step 1: Storing shipping details
When our client receives the shipping notification via email. The administrator types in the details to the WooCommerce order. The additional information is stored using a few fields created with Advanced Custom Fields.
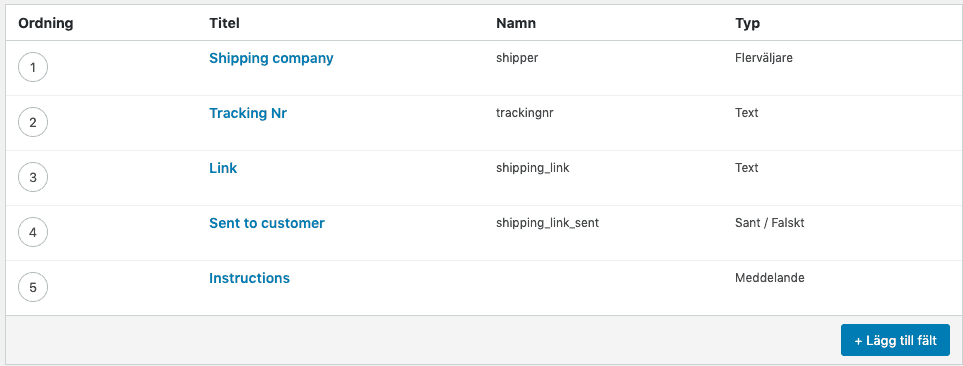
The fields are very straight forward. We store the name of the shipping company, the tracking ID, a tracking link and a field that keeps track of if we sent the email or not. We also added a field to type in usage instructions that are visible for the administrator.
This is what the fields look like in the order edit screen:
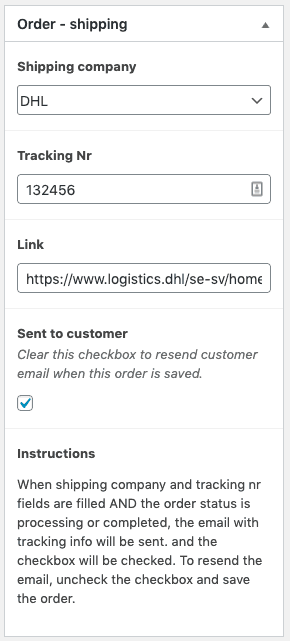
By making the field “Sent to customer” visible and editable for the administrator, we make it possible to manually resend the email if needed. In all, the above fields are all we need to send out delivery tracking from WooCommerce.
Step 2: Sending out shipping details via mail
The last part in this setup is to actually send out an email to the customer. We solved this by setting up a new workflow in WunderAutomation:
Workflow Trigger: Order Saved.
Filters:
- Custom field: shipping_link is not empty
- Custom field: shipping_link_sent does not equal 1
Actions:
- Send a text email
- Change custom field
Filters
We use two filters. The first to check if there is any text typed in to the field “shipping_link”. The second filter checks if the email has already been sent. Note that this workflow was created before version 1.2 was released, so the field names are typed in directly. From 1.2 and onward there is explicit support for Advanced Custom Fields that makes it easier to pick out the correct field.
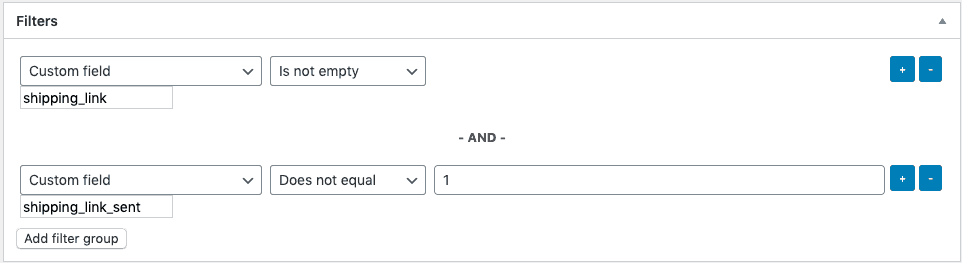
Using these two filters we make sure that the actions, described below, are not executed unless both filter conditions are met. This is pretty much the core functionality of WunderAutomation, using one or more filters to get detailed control of when to take a certain action.
Wait, one is one filter missing?
You might wonder why there’s only these two filters defined when the description in the screen shot above also mentions order status? Well, it’s a simplification that our client made themselves. At the start we also had a filter that checks if the order is paid or not, but our client removed it for increased flexibility. In some cases they wanted to send the email even if the order was technically still not paid. They’ve decided that whoever enters shipping information on an order is mature enough to understand that a notification email is sent out. It’s their business so they are allowed to set their own rules.
As a developer, it might feel a bit uneasy to let a non-technical client make these kind of modifications. We can think of a ton of “what if” scenarios with bad outcomes. But from our clients perspective, they are over the moon about the fact that they can both understand and modify the exact behaviour of the workflow. They are in control and they like it.
Action #1: Send a text email
OK. If both the two above filters pass, the first action sends out the delivery tracking notifications to the customer. We use “billing_email” from the WooCommerce order as the recipient and we also send a bcc to the clients order email. The email body uses several parameters from the order specifically the data entered into the custom fields.
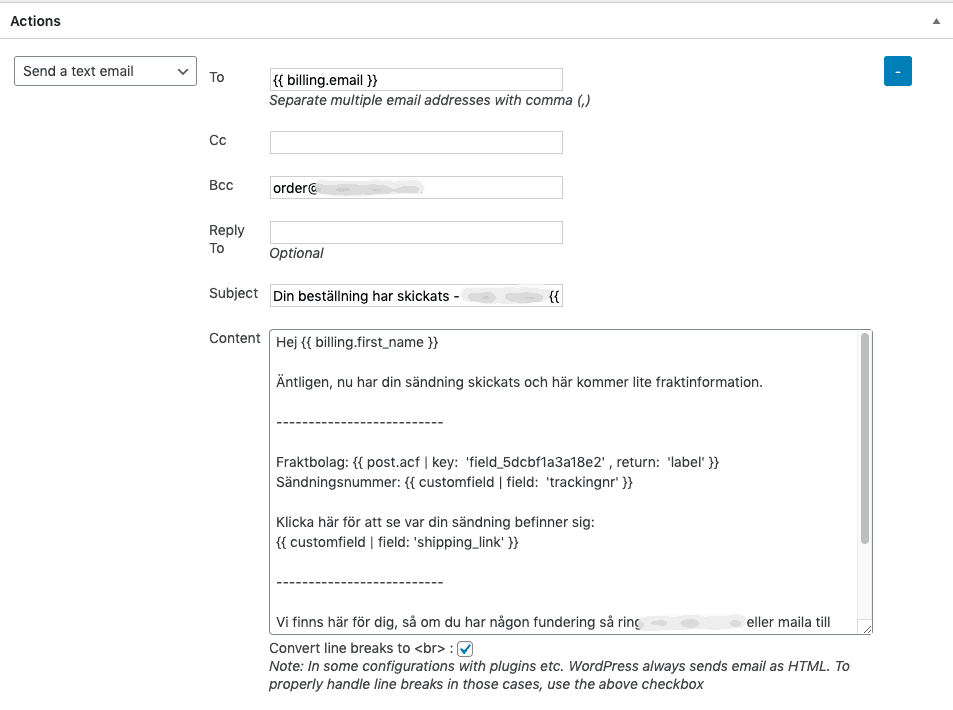
To compose the email we pick up the clients email address and name, the name of the shipping company and other details about the tracking information. Note that we’ve updated this action with some functionality from version 1.2. Instead of returning the raw database value of the shipping company name, we use the “label” version of it. This is possible with the explicit support for Advanced Custom Fields that was introduced in 1.2. As a result, it’s possible to make a dropdown with proper key/value paris but use the human readable value (label) when using the parameter in an email.
Action #2: Change custom field
The second action updates the custom field “shipping_link_sent” to the value 1. This is how we make sure that the tracking information isn’t sent out each time the order happens to be saved. The field name we update here is of course the same that we use in the filters above. Quite simply:
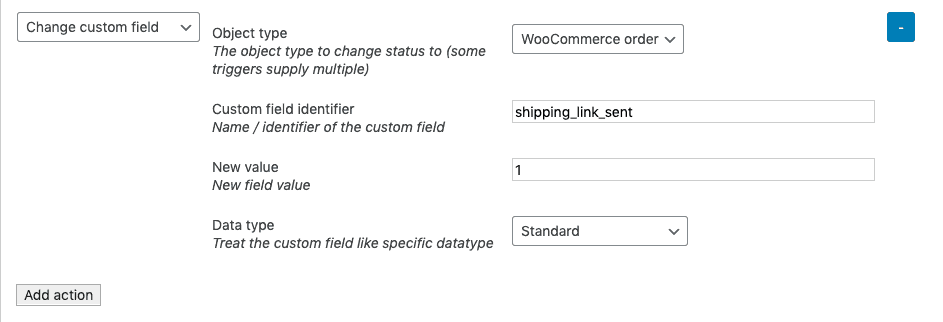
The fact that we’re setting the value to 1 is simply because this is how Advanced Custom Fields would have stored the value if we had manually checked the checkbox and saved the order. The next time we open the order in the admin area, the checkbox will be filled in. More important, the next time this workflow runs, the filters won’t pass and the actions won’t be executed.
Step 3
There is no step 3, this entire workflow really only requires two steps to implement.
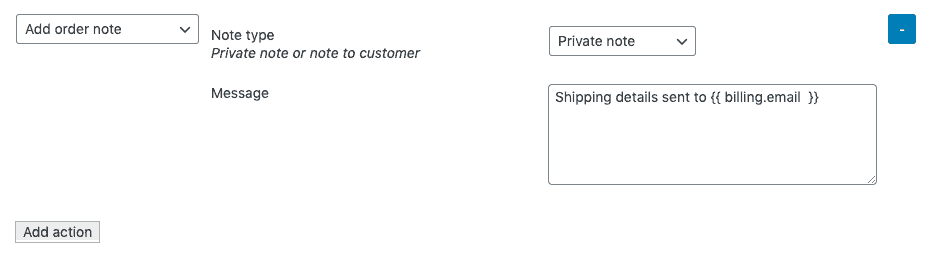
Potential improvements
If this was our own site, we’d also create an order note on the order so that we’d get a log entry for when (date and time) the email notification was sent. This would have been easy to do by just adding a 3rd action of type “Add order note”. Our client is able to track this anyway since they BCC an internal email address so they opted not to. But here’s what it would have looked like in the workflow edit screen:
An other improvement we suggested was to also send out the delivery tracking from WooCommerce via SMS. It would have been easy to accomplish. We’ve described how to send SMS from WunderAutomation via Twilio in a previous post. But our client have decided to wait a bit before adding this functionality.